
What is a client design system?
A design system is the client's brand, written down so Claude and Lovable can follow it. It holds the client's colors, fonts, type sizes, spacing, components and writing rules. Claude and Lovable read it before they design anything.
Every client should get a design system in Claude before design work starts in Claude or Lovable. The Claude design system is the source of truth. The Lovable design system is built from it.
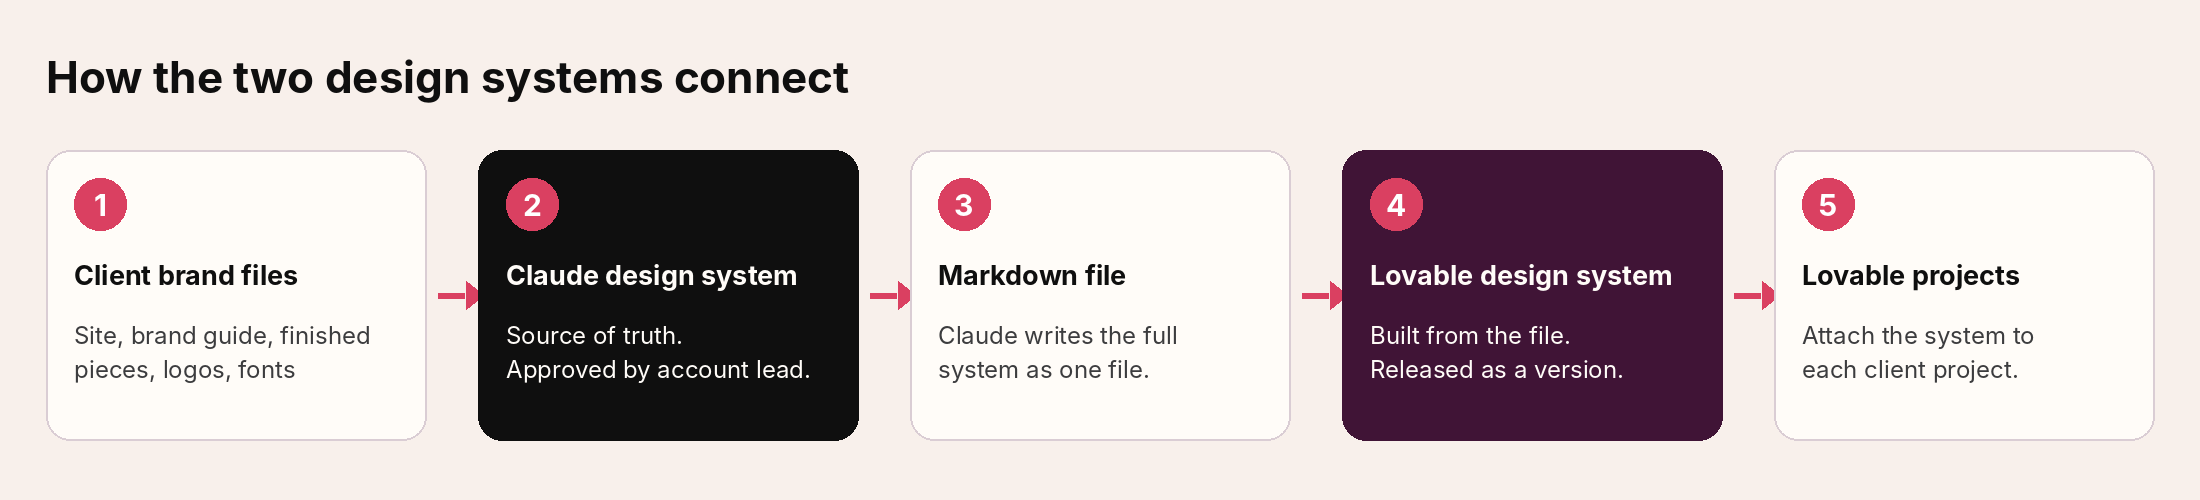
Figure 1. How the two design systems connect.
Who does what
| Role | Responsibility |
|---|---|
| Lead designer on the client | Builds the Claude and Lovable design systems. Keeps both current. |
| Account lead | Reviews the test pieces. Approves the design system before the team uses it. |
| Dale Riether | Answers questions about this process. Manages the Claude and Lovable workspace settings. |
Before you start
Collect these files from the client or the client folder before you open Claude. Real finished work gives better results than a list of colors and fonts.
- Live website URL
- Current brand guide (PDF)
- 2–3 finished pieces that look right: a recent deck, a landing page, a one-pager
- Logo files (SVG preferred, PNG accepted)
- Font files (.woff2, .ttf or .otf)
- Code repository link, only if the client has a component library
No font files? Claude will use a close free font and note it. Record this as an open item for the account lead.
How to set up the Claude design system (step-by-step)
Work in claude.ai. Do not use the old claude.ai/design site. It closes December 14, 2026.
Step 1: Create the design system
In Claude, go to Settings › Design systems. Click New design system (1), then Using Claude (2).
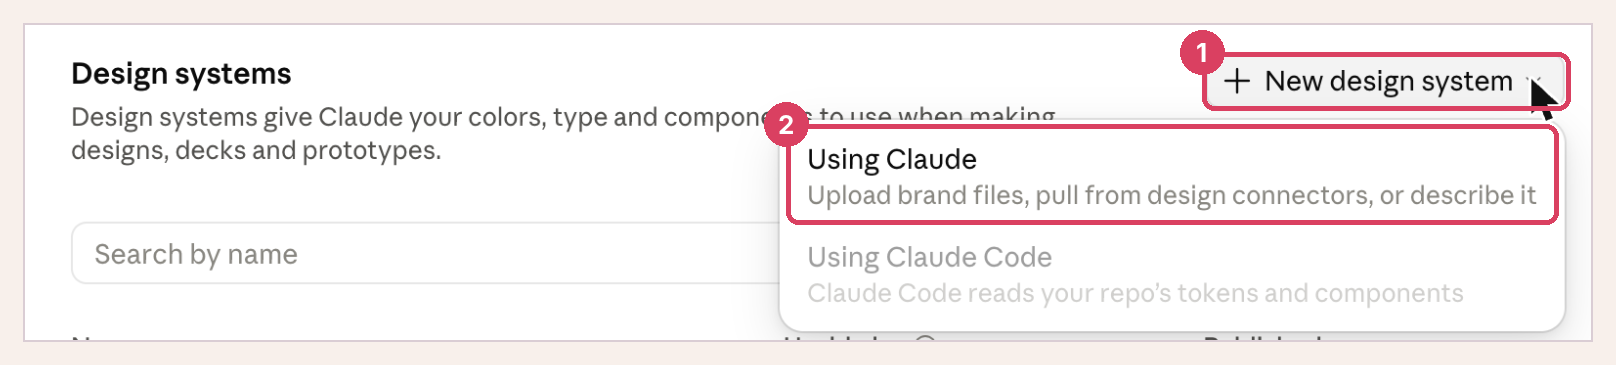
Figure 2. Settings › Design systems › New design system › Using Claude.
Another way in: in the left sidebar, click Design, then the Design System tile.

Figure 3. The Design System tile on the Design page.
Step 2: Upload the client's files
On the screen "What should this design system be built from?", choose Upload brand files (1). If the client has a component library in a code repository, choose Sync from GitHub instead.
Upload every file from the checklist. Type the live website URL in the chat and ask Claude to use it as a source.
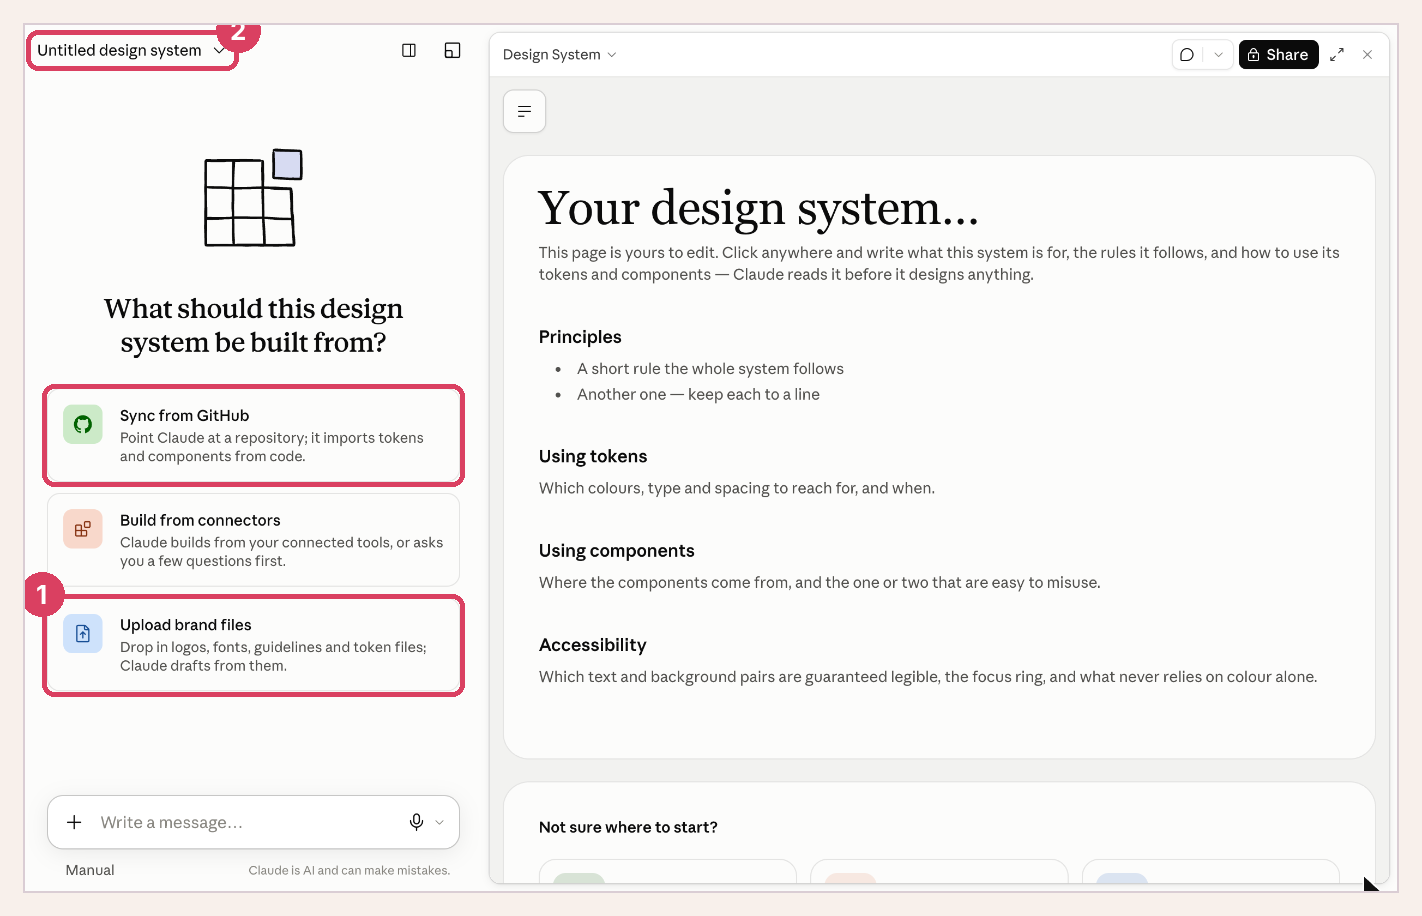
Figure 4. Choose a source. Rename the system with the title menu (2).
Step 3: Name the system
Click the title at the top left (2 in Figure 4). Rename it [Client] Design System. Example: "Burley Foods Design System."
Step 4: Review what Claude built
Open each section in the left menu (1): Overview, Colors, Typography, Spacing, Components, Assets.
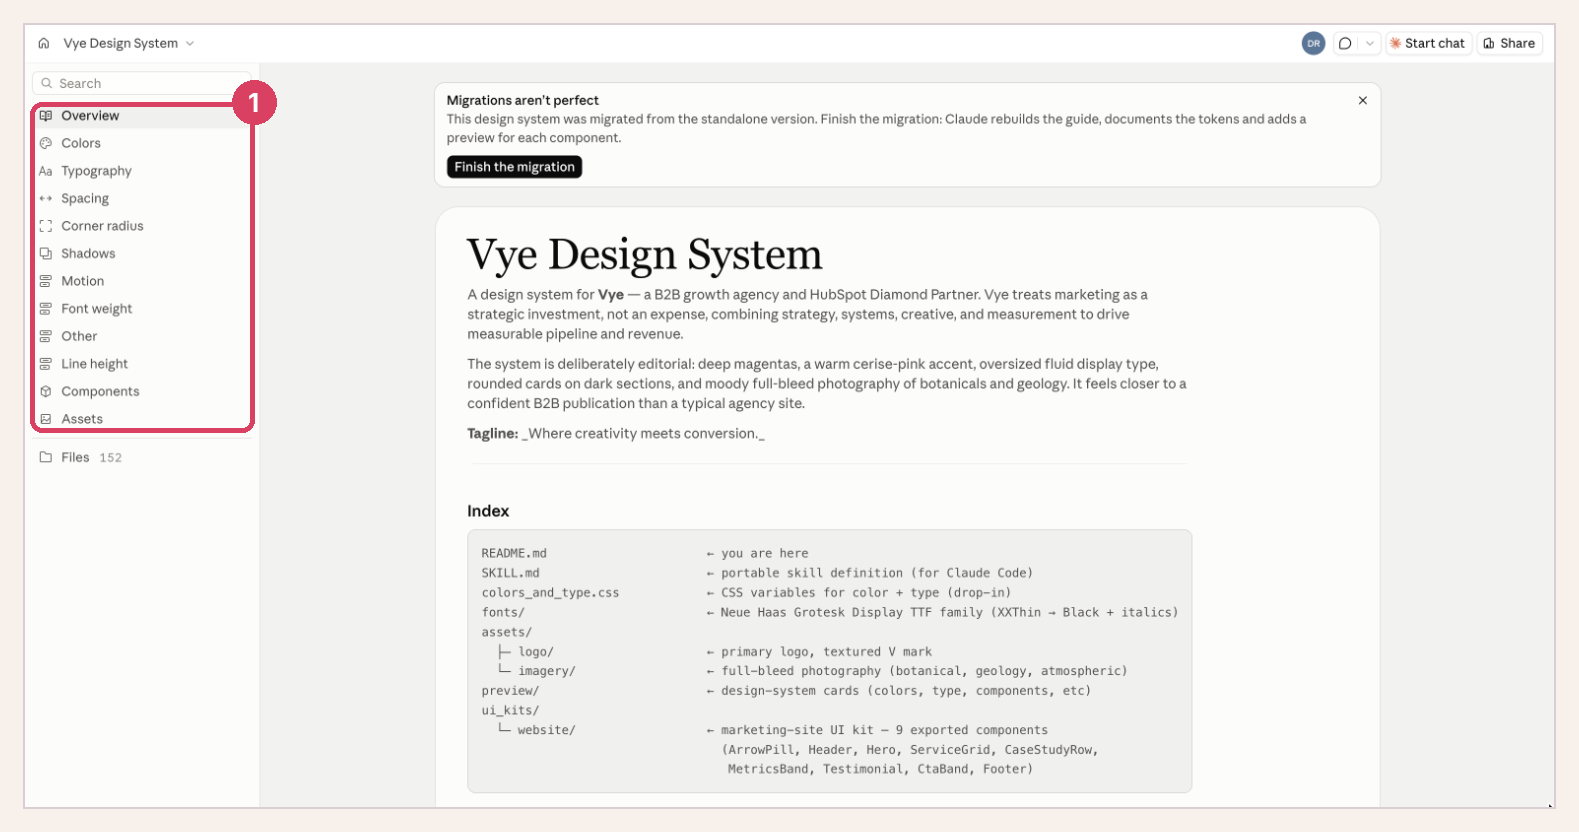
Figure 5. The sections of a design system.
- Compare every hex code to the brand guide.
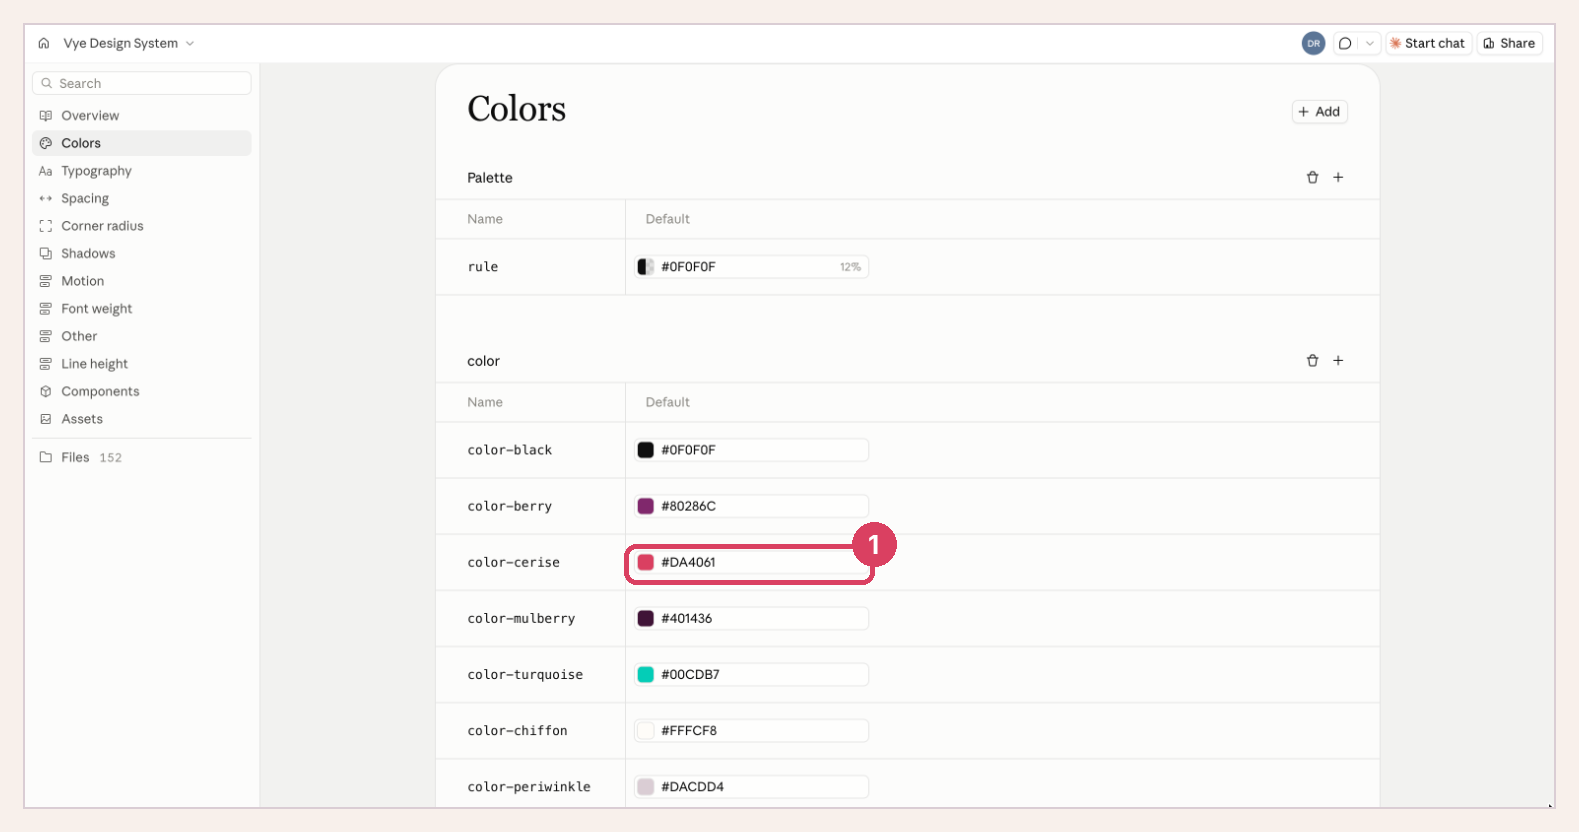
Figure 6. Each color is listed with its hex code. Click a value to change it.
- Compare the font names to the brand guide. Upload licensed font files on the Typography page with Upload font (1).
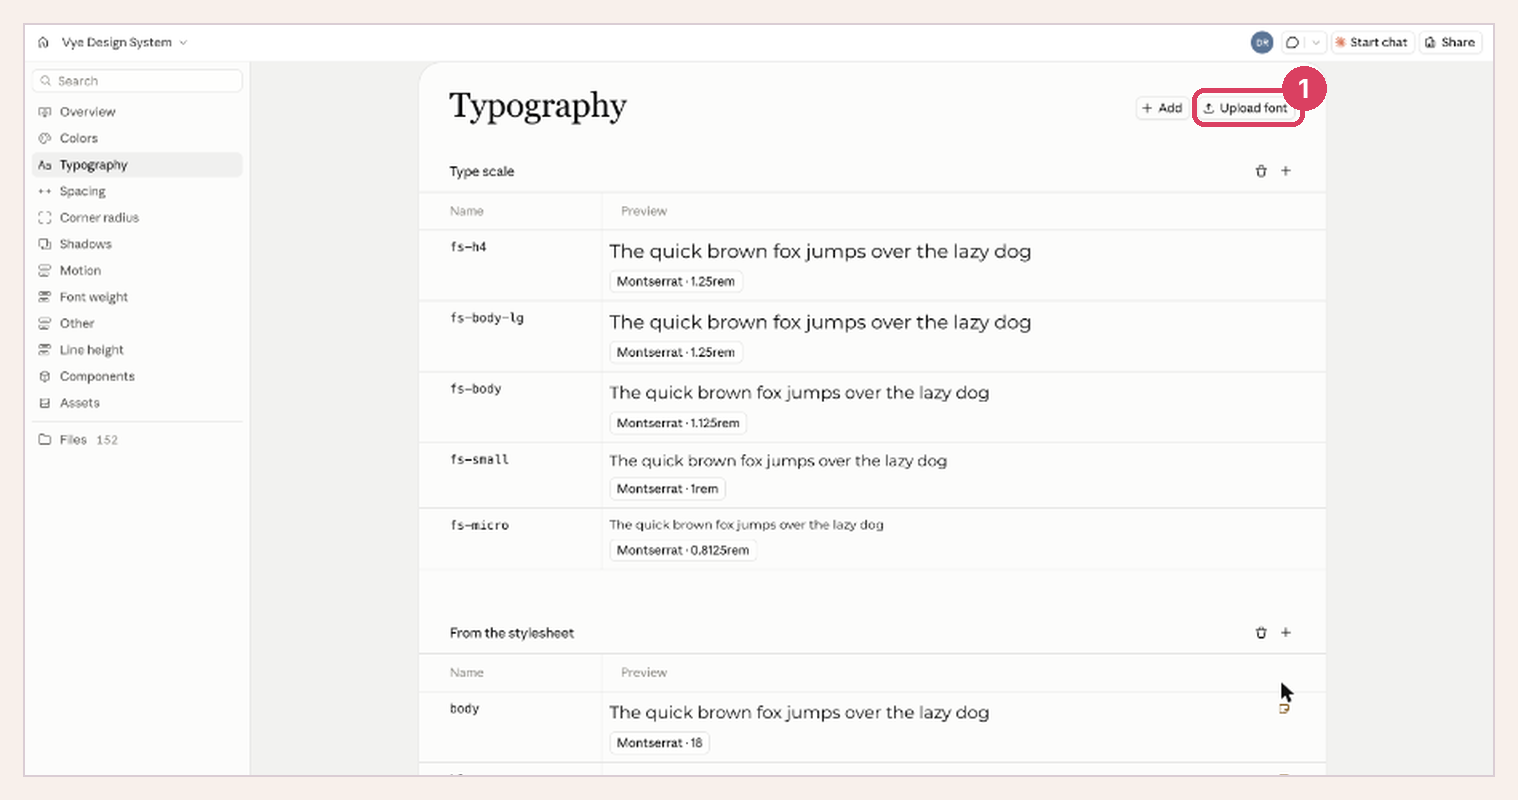
Figure 7. Upload font on the Typography page.
- Read any note where Claude says it guessed, such as a stand-in font or a redrawn logo.
- To fix anything else, describe the change in the chat.
Step 5: Test the system
Start a new chat. Click +, then Design system (1), and tick the client's system (2). Ask Claude for a landing page, a short deck and a one-pager.
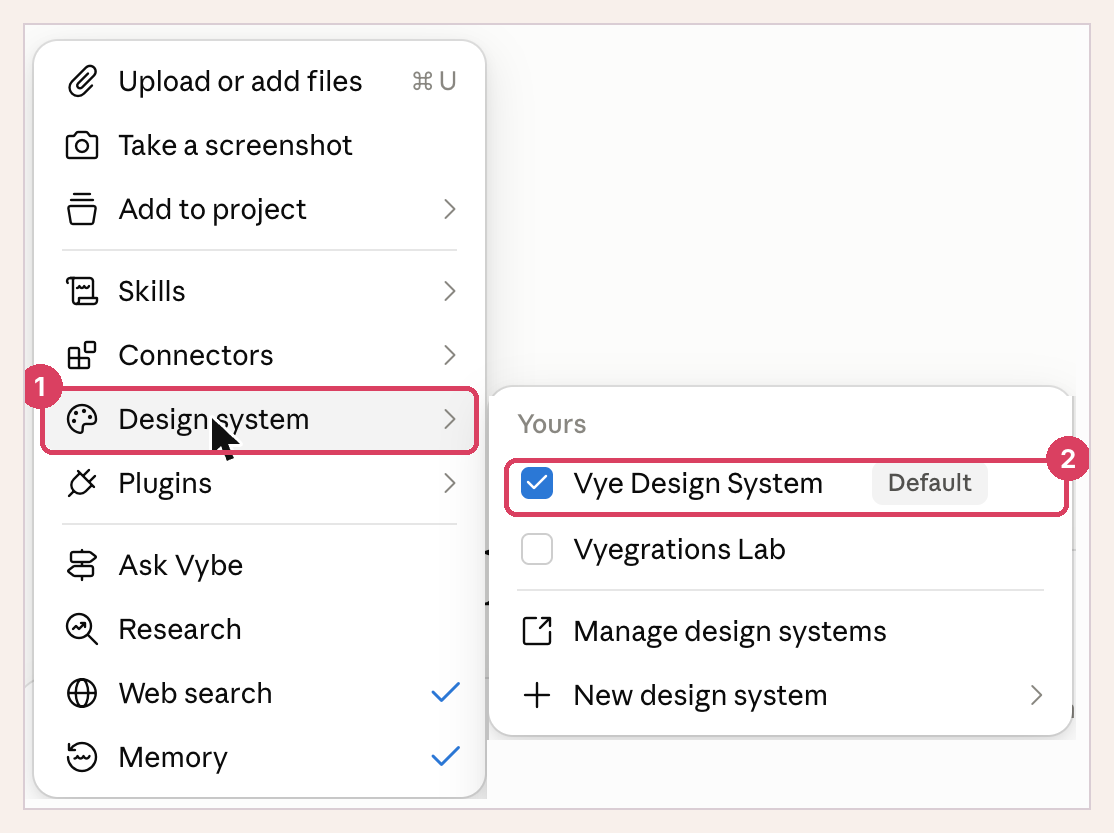
Figure 8. Select the client's design system before you start work.
Step 6: Get approval
Send the three test pieces to the account lead. Do not share the system with the team until the account lead approves.
Step 7: Share the system with the team
Go to Settings › Design systems. Open the ⋯ menu on the client's system (1) and click Share. Set it so anyone at Vye can use it. The Usable by column shows "Anyone at Vye" when this is done.
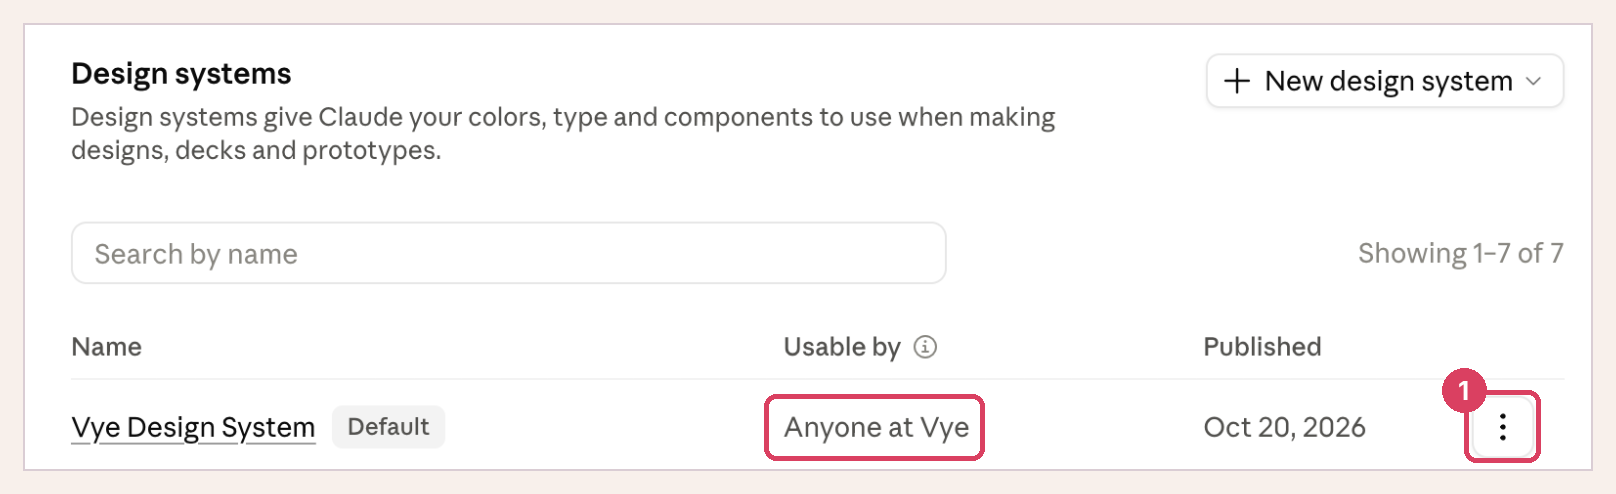
Figure 9. Settings › Design systems. Share from the ⋯ menu.
Do not click Set as default on a client system. The Vye Design System is the org default.
How to set up the Lovable design system (step-by-step)
Start this section only after the account lead approves the Claude design system. Build it in the Vye Lovable workspace.
Step 1: Export the Claude design system as one file
In Claude, open the client's design system. In its chat, type: "Write this design system as one Markdown file. Include every color with its hex code, every font, type size, spacing value and component rule." Download the file.
Step 2: Create the design system in Lovable
In Lovable, click + in the prompt box. Choose Design › Use a design system › Create design system. This creates a new design system project.
Step 3: Name it
In the project settings, rename it [Client] Design System. Use the same name as in Claude.
Step 4: Upload the files and build
In the project chat, upload the Markdown file from Step 1, the logo files, the font files and screenshots of the approved test pieces. Ask Lovable to build the design tokens and components from them.
Step 5: Check it against the Claude design system
Compare the preview to the Claude design system. Colors, fonts and buttons must match. Fix differences in the chat.
Step 6: Release a version
Click Release version. A design system cannot be used until it is released.
Step 7: Attach it to the client's project
- New project: click + › Design › Use a design system, choose the client's system, then enter your prompt.
- Existing project: go to Project settings › General › Design system and click Attach design system.
Do not set a client system as the workspace default in Workspace settings › Design systems.
Quality check before use
The account lead checks each item. Every item must pass before the team uses the design system.
- Colors match the brand guide hex codes.
- Headline and body fonts are the client's fonts, or the substitute is recorded as an open item.
- The logo is the client's real file, not a redrawn version.
- The landing page, deck and one-pager each look like the client's existing work.
- The name is "[Client] Design System" in both Claude and Lovable.
- The Claude system is shared with anyone at Vye and is not the org default.
- The Lovable system is released and attached to the client's project.
How to update a design system
Change the Claude design system first. Then update Lovable to match. Update both when the client's brand changes or when a gap is found.
- In Claude, open the client's design system and describe the change in its chat.
- Ask Claude for a new Markdown file of the full design system (Lovable Step 1).
- In Lovable, open the client's design system project. Upload the new file and ask Lovable to apply the change.
- Click Release version.
- Open each Lovable project connected to it. Accept the Update available prompt in the project chat.
Updates do not reach a Lovable project until someone accepts them. Edits made to design system files inside a project are overwritten when an update is accepted. Make all design system changes in the design system itself.
Rules
- One design system per client in each tool, with the same name in both.
- Client systems are never the default in Claude or Lovable.
- Before any client work in Claude, select the client's system: + › Design system. New chats use the Vye Design System unless you change it.
- A Lovable project can connect to one design system only. To switch, go to Project settings › General › Design system › ⋯ › Remove, then attach the new one.
- Lovable design systems support React projects only.
- An existing Lovable project cannot be turned into a design system. Create a new one with Create design system.
Questions
Contact Dale Riether.
Related links: Anthropic: Set up a design system · Lovable: Design systems · Building Apps in Lovable: The Vye Playbook